DirectShow for Processing

I adopt the DirectShow Java Wrapper to work in Processing with two classes, one for movie playback and one for video capture. At this moment, there are just two Java classes, not an individual library yet. Since it is for DirectShow, it is of course in Windows platform. You have to package the dsj.jar and the dsj.dll (32bit or 64bit according to your platform) into your code folder.
 
The DMovie class for movie playback

import de.humatic.dsj.*;
import java.awt.image.BufferedImage;
 
class DMovie implements java.beans.PropertyChangeListener {
 
  private DSMovie movie;
  public int width, height;
 
  DMovie(String _s) {
    movie = new DSMovie(dataPath(_s), DSFiltergraph.DD7, this);
    movie.setVolume(1.0);
    movie.setLoop(false);
    movie.play();
    width = movie.getDisplaySize().width;
    height = movie.getDisplaySize().height;
  }
 
  public PImage updateImage() {
    PImage img = createImage(width, height, RGB);
    BufferedImage bimg = movie.getImage();
    bimg.getRGB(0, 0, img.width, img.height, img.pixels, 0, img.width);
    img.updatePixels();
    return img;
  }
 
  public void loop() {
    movie.setLoop(true);
    movie.play();
  }
 
  public void play() {
    movie.play();
  }
 
  public void propertyChange(java.beans.PropertyChangeEvent e) {
    switch (DSJUtils.getEventType(e)) {
    }
  }
}

 
Sample code that uses the DMovie class

DMovie mov;
 
void setup()
{
  size(1280, 692);
  background(0);
  mov = new DMovie("Hugo.mp4");
  mov.loop();
  frameRate(25);
}
 
void draw()
{
  image(mov.updateImage(), 0, 0);
}

 
The DCapture class that performs video capture with the available webcam

import de.humatic.dsj.*;
import java.awt.image.BufferedImage;
 
class DCapture implements java.beans.PropertyChangeListener {
 
  private DSCapture capture;
  public int width, height;
 
  DCapture() {
    DSFilterInfo[][] dsi = DSCapture.queryDevices();
    capture = new DSCapture(DSFiltergraph.DD7, dsi[0][0], false, 
    DSFilterInfo.doNotRender(), this);
    width = capture.getDisplaySize().width;
    height = capture.getDisplaySize().height;
  }
 
  public PImage updateImage() {
    PImage img = createImage(width, height, RGB);
    BufferedImage bimg = capture.getImage();
    bimg.getRGB(0, 0, img.width, img.height, img.pixels, 0, img.width);
    img.updatePixels();
    return img;
  }
 
  public void propertyChange(java.beans.PropertyChangeEvent e) {
    switch (DSJUtils.getEventType(e)) {
    }
  }
}

Sample code that uses the DCapture class

DCapture cap;
 
void setup() 
{
  size(640, 480);
  background(0);
  cap = new DCapture();
}
 
void draw()
{
  image(cap.updateImage(), 0, 0, cap.width, cap.height);
}

Video Playback Performance – Processing

I try out different video playback mechanism in the Processing to compare their performance. The digital video is the one I used in the last post. It is the trailer of the film Hugo. The details are: 1280 x 692 H.264 AAC, bitrate 2,093.

The computer I am using is iMac 3.06 GHz Intel Core 2 Duo, 4 GB RAM, ATI Radeon HD 4670 256 MB graphic card. Processing is the latest 1.5.1 version.

For the video playback classes, I tested the default QuickTime Video library, a FasterMovie class, the GSVideo library, and the JMCVideo library with JavaFX 1.2 SDK.

To render the video, I start with the standard image() function, and proceed to test with various OpenGL texturing methods, including the GLGraphics library.

Again, I sample the CPU and Memory usage with the Activity Monitor from the Mac OSX utilities, in an interval of 30 seconds. The results are the average of 5 samples.

Performance with 2D image function

CPU (%) Memory (Mb)
QuickTime 175 221
FasterMovie 137 275
GSVideo 151 118
JMCVideo 147 87

The OpenGL and QuickTime video libraries have problem working together. The program stops at the size() statement. I have to either put the first video related command before the size() or a dummy line

println(Capture.list());
size(1280, 692, OPENGL);

The second batch of tests use the standard OpenGL vertex and texture functions.

Performance with OpenGL texture and vertex functions

CPU (%) Memory (Mb)
QuickTime 158 430
FasterMovie 143 610
GSVideo 147 315
JMCVideo 142 397

The third batch of tests involve custom arrangement in OpenGL. Both GSVideo and JMCVideo come with their own functions to write directly to OpenGL texture. For the FasterMovie test, I combine it with the pixel buffer object I have shown in my previous post.
 
Performance with custom OpenGL texture method

  CPU (%) Memory (Mb)
FasterMovie+PBO 69 275
GSVideo+GLGraphics 58 120
JMCVideo+OpenGL 57 91

 
Sample code for GSVideo and GLGraphics (from codeanticode)

import processing.opengl.*;
import codeanticode.glgraphics.*;
import codeanticode.gsvideo.*;
 
GSMovie mov;
GLTexture tex;
 
void setup() 
{
  size(1280, 692, GLConstants.GLGRAPHICS);
  background(0);   
  mov = new GSMovie(this, "Hugo.mp4");
  tex = new GLTexture(this);
  mov.setPixelDest(tex);  
  mov.loop();
}
 
void draw() 
{
  if (tex.putPixelsIntoTexture()) 
  {
    image(tex, 0, 0);
  }
}
 
void movieEvent(GSMovie _m) {
  _m.read();
}

 
Sample code for JMCVideo (from Angus Forbes)

import jmcvideo.*;
import processing.opengl.*;
import javax.media.opengl.*; 
 
JMCMovieGL mov;
PGraphicsOpenGL pgl;
 
void setup() 
{
  size(1280, 692, OPENGL);
  background(0);
  mov = new JMCMovieGL(this, "Hugo.mp4", ARGB);
  mov.loop();
 
  pgl = (PGraphicsOpenGL) g;
  GL gl = pgl.beginGL();  
  gl.glViewport(0, 0, width, height);
  pgl.endGL();
}
 
void draw() 
{
  GL gl = pgl.beginGL();  
  mov.image(gl, 0, 0, width, height);
  pgl.endGL();
}

Video Playback Performance – OSX

I have done a simple performance comparison with a number of video playback methods in OSX. It gives me some ideas about which development platforms, namely the OpenFrameworks and Library Cinder to work on with high quality video playback. The test is straight forward, and as the same time, not very rigorous. VLC and Real Player are used as benchmark for comparison. The OpenFrameworks and Cinder programs are the standard QuickTime video player samples in the distributions.

I use the trailer for the film Hugo in 720 HD. The exact dimension is 1280 x 692 H.264 AAC and bitrate at 2,093.


Software CPU (%) Memory (Mb)
VLC 34 114
Real Player 34 55
OpenFrameworks 52 37
Cinder 37 43

 
The figures are average of 5 samples taken at an interval of 30 seconds.

Pixel Buffer Object in Processing

People switching from Processing to OpenFrameworks or other more serious development platforms due to performance consideration. I have done a few searches and found that there are a number of libraries using different Java bindings of OpenCL, Vertex Buffer Object, Pixel Buffer Object, and even DirectShow. I wonder if it is more possible to use Processing in production environment where performance is important.

I have done a test to compare using live webcam video stream with traditional texture method and another one with pixel buffer object. The performance difference is noticeable and significant using my MacBook Pro. I do not record the videos as it may distort the real time performance.

This is the ‘traditional’ method.

import processing.video.*;
import processing.opengl.*;
 
float a;
 
Capture cap;
PImage img;
 
void setup()
{
  println(Capture.list());
  size(640, 480, OPENGL);
  hint(ENABLE_OPENGL_2X_SMOOTH);
  hint(DISABLE_DEPTH_TEST);
  a = 0;
 
  img = loadImage("tron.jpg");
  frameRate(30);
  cap = new Capture(this, width, height, 30);
  cap.read();
  textureMode(NORMALIZED);
}
 
void draw()
{
  background(0);
  image(img, 0, 0);
  translate(width/2, height/2, 0);
  float b = a*PI/180.0;
  rotateY(b);
  rotateX(b);
  beginShape(QUADS);
  texture(cap);
  vertex(-320, -240, 0, 0, 0);
  vertex( 320, -240, 0, 1, 0);
  vertex( 320, 240, 0, 1, 1);
  vertex(-320, 240, 0, 0, 1);
  endShape();
  a += 1;
  a %= 360;
}
 
void captureEvent(Capture _c)
{
  _c.read();
}


This is the PBO mehtod.

import processing.video.*;
import processing.opengl.*;
import javax.media.opengl.*;
import java.nio.IntBuffer;
 
float a;
PGraphicsOpenGL pgl;
GL gl;
PImage img;
 
int [] tex = new int[1];
int [] pbo = new int[1];
 
Capture cap;
 
void setup()
{
  println(Capture.list());
  size(640, 480, OPENGL);
  hint(ENABLE_OPENGL_2X_SMOOTH);
  hint(DISABLE_DEPTH_TEST);
  a = 0;
 
  img = loadImage("tron.jpg");
  frameRate(30);
  pgl = (PGraphicsOpenGL) g;
  cap = new Capture(this, width, height, 30);
  cap.read();
 
  gl = pgl.gl;
 
  gl.glGenBuffers(1, pbo, 0);
  gl.glBindBuffer(GL.GL_PIXEL_UNPACK_BUFFER, pbo[0]);  
  gl.glBufferData(GL.GL_PIXEL_UNPACK_BUFFER, 4*cap.width*cap.height, null, GL.GL_STREAM_DRAW);
  gl.glBindBuffer(GL.GL_PIXEL_UNPACK_BUFFER, 0);
 
  gl.glGenTextures(1, tex, 0);
  gl.glBindTexture(GL.GL_TEXTURE_2D, tex[0]);
 
  gl.glTexParameteri(GL.GL_TEXTURE_2D, GL.GL_TEXTURE_MIN_FILTER, GL.GL_NEAREST);
  gl.glTexParameteri(GL.GL_TEXTURE_2D, GL.GL_TEXTURE_MAG_FILTER, GL.GL_NEAREST);
  gl.glTexParameteri(GL.GL_TEXTURE_2D, GL.GL_TEXTURE_WRAP_S, GL.GL_CLAMP);
  gl.glTexParameteri(GL.GL_TEXTURE_2D, GL.GL_TEXTURE_WRAP_T, GL.GL_CLAMP);
 
  gl.glTexImage2D(GL.GL_TEXTURE_2D, 0, GL.GL_RGBA, cap.width, cap.height, 0, GL.GL_BGRA, GL.GL_UNSIGNED_BYTE, null);
  gl.glBindTexture(GL.GL_TEXTURE_2D, 0);
}
 
void draw()
{
  background(0);
  image(img, 0, 0);
 
  gl = pgl.beginGL();
  gl.glColor3f( 1.0f, 1.0f, 1.0f);	
 
  gl.glEnable(GL.GL_TEXTURE_2D);
 
  gl.glBindTexture(GL.GL_TEXTURE_2D, tex[0]);
  gl.glBindBuffer(GL.GL_PIXEL_UNPACK_BUFFER, pbo[0]);
 
  gl.glTexSubImage2D(GL.GL_TEXTURE_2D, 0, 0, 0, cap.width, cap.height, GL.GL_BGRA, GL.GL_UNSIGNED_BYTE, 
  0);
 
  gl.glBufferData(GL.GL_PIXEL_UNPACK_BUFFER, 4*cap.width*cap.height, null, GL.GL_STREAM_DRAW);
 
  IntBuffer tmp1 = gl.glMapBuffer(GL.GL_PIXEL_UNPACK_BUFFER, GL.GL_WRITE_ONLY).asIntBuffer();
  tmp1.put(cap.pixels);
 
  gl.glUnmapBuffer(GL.GL_PIXEL_UNPACK_BUFFER);
  gl.glBindBuffer(GL.GL_PIXEL_UNPACK_BUFFER, 0);
 
  gl.glTranslatef(width/2, height/2, 0);
  gl.glRotatef(a, 1, 1, 0);
 
  gl.glBegin(GL.GL_QUADS);	
  gl.glTexCoord2f(0.0f, 0.0f);			
  gl.glVertex3f(-320, -240, 0);
  gl.glTexCoord2f(1.0f, 0.0f);
  gl.glVertex3f( 320, -240, 0);
  gl.glTexCoord2f(1.0f, 1.0f);
  gl.glVertex3f( 320, 240, 0);
  gl.glTexCoord2f(0.0f, 1.0f);
  gl.glVertex3f(-320, 240, 0);
  gl.glEnd();
  gl.glBindTexture(GL.GL_TEXTURE_2D, 0);
  pgl.endGL();
  a += 1.0;
  a %= 360;
}
 
void captureEvent(Capture _c)
{
  _c.read();
}


Neurosky MindWave and Processing

This is my first trial run of a Neurosky MindWave sensor with a custom program written in Processing. The connection architecture is quite straight forward. The ThinkGear connector is a background process that reads from the IR serial port to obtain the brainwave signals and distributes them through a TCP socket server (localhost with port 13854).


There are a number of Java socket clients implementation. I use the ThinkGear Java library from Creation.

Eric Blue has another Processing based visualizer using the MindWave.

ZeroShore has another implementation with an animation called HyperCat.
 
Sample Code

import processing.video.*;
import neurosky.*;
import org.json.*;
 
ThinkGearSocket neuroSocket;
int attention = 0;
int meditation = 0;
int blinkSt = 0;
PFont font;
int blink = 0;
Capture cap;
 
void setup() 
{
  size(640, 480);
  ThinkGearSocket neuroSocket = new ThinkGearSocket(this);
  try 
  {
    neuroSocket.start();
  } 
  catch (ConnectException e) {
    e.printStackTrace();
  }
  smooth();
  font = loadFont("MyriadPro-Regular-24.vlw");
  textFont(font);
  frameRate(25);
  cap = new Capture(this, width, height);
  noStroke();
}
 
void draw() 
{
  background(0);
 
  image(cap, 0, 0);
  fill(255, 255, 0);
  text("Attention: "+attention, 20, 150);
  fill(255, 255, 0, 160);
  rect(200, 130, attention*3, 40);
  fill(255, 255, 0);
  text("Meditation: "+meditation, 20, 250);
  fill(255, 255, 0, 160);
  rect(200, 230, meditation*3, 40);
 
  if (blink>0) 
  {
    fill(255, 255, 0);
    text("Blink: " + blinkSt, 20, 350);
    if (blink>15) 
    {
      blink = 0;
    } 
    else 
    {
      blink++;
    }
  }
}
 
void captureEvent(Capture _c) 
{
  _c.read();
}
 
void attentionEvent(int attentionLevel) 
{
  attention = attentionLevel;
}
 
void meditationEvent(int meditationLevel) 
{
  meditation = meditationLevel;
}
 
void blinkEvent(int blinkStrength) 
{
  blinkSt = blinkStrength;
  blink = 1;
}
 
void stop() {
  neuroSocket.stop();
  super.stop();
}

Building the new OpenCV 2.3.1 in OSX

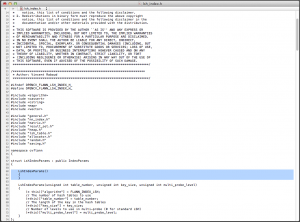
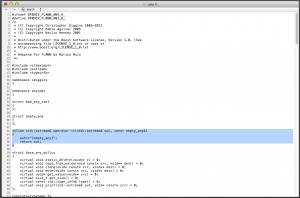
I am testing with the OpenCV 2.3.1 in OSX. The Homebrew and MacPorts versions do not build with the OpenNI option. To build it myself with CMake and XCode, I came into compilation error with the flann include files: any.h and lsh_index.h. After searching for a while, I found the solution as stated in Hiroaki Sawano’s website and patched the two files.

lsh.index.h

any.h

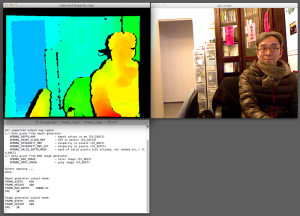
kinect_maps sample run

People Detection in OpenCV again

There are a number of enquiries about the people detection video I did a while ago. It is a step by step explanation of what I have done. I use the XCode 4 in OSX Lion with OpenCV 2.3 to try out the following.

The first step is to download and build the latest OpenCV 2.3 into the folder at /Developer/OpenCV-2.3.0. The headers are in the include folder. Please note that you may have to copy the individual include folders from the modules folder. I build the shared libraries in the lib/Release folder.

The code is a modification of the sample peopledetect.cpp.

The second step is to display the video capture image. I use the example from the C++ reference manual in the highgui section.

#include <iostream>
#include <opencv2/opencv.hpp>
 
using namespace std;
using namespace cv;
 
int main (int argc, const char * argv[])
{
    VideoCapture cap(CV_CAP_ANY);
    if (!cap.isOpened())
        return -1;
 
    Mat img;
    namedWindow("video capture", CV_WINDOW_AUTOSIZE);
    while (true)
    {
        cap >> img;
        imshow("video capture", img);
        if (waitKey(10) >= 0)
            break;
    }
    return 0;
}

The last step is to combine the two examples into one, with a little adjustment of the detection parameters and the display rectangle size.

#include <iostream>
#include <opencv2/opencv.hpp>
 
using namespace std;
using namespace cv;
 
int main (int argc, const char * argv[])
{
    VideoCapture cap(CV_CAP_ANY);
    cap.set(CV_CAP_PROP_FRAME_WIDTH, 320);
    cap.set(CV_CAP_PROP_FRAME_HEIGHT, 240);    
    if (!cap.isOpened())
        return -1;
 
    Mat img;
    HOGDescriptor hog;
    hog.setSVMDetector(HOGDescriptor::getDefaultPeopleDetector());
 
    namedWindow("video capture", CV_WINDOW_AUTOSIZE);
    while (true)
    {
        cap >> img;
        if (!img.data)
            continue;
 
        vector<Rect> found, found_filtered;
        hog.detectMultiScale(img, found, 0, Size(8,8), Size(32,32), 1.05, 2);
 
        size_t i, j;
        for (i=0; i<found.size(); i++)
        {
            Rect r = found[i];
            for (j=0; j<found.size(); j++)
                if (j!=i && (r & found[j])==r)
                    break;
            if (j==found.size())
                found_filtered.push_back(r);
        }
        for (i=0; i<found_filtered.size(); i++)
        {
	    Rect r = found_filtered[i];
            r.x += cvRound(r.width*0.1);
	    r.width = cvRound(r.width*0.8);
	    r.y += cvRound(r.height*0.06);
	    r.height = cvRound(r.height*0.9);
	    rectangle(img, r.tl(), r.br(), cv::Scalar(0,255,0), 2);
	}
        imshow("video capture", img);
        if (waitKey(20) >= 0)
            break;
    }
    return 0;
}

Please note that the performance is pretty slow even though the capture size is 320 x 240.